

츄르사려고 코딩하는집사입니다.
스프링 프레임워크(Spring FrameWork)에서 프로젝트를 위한 세팅하는 방법
1. 이클립스(Eclipse)를 설치하고, 이클립스(Eclipse)에 스프링(Spring)을 install한다.
2. 그 후에, 이클립스(Eclipse)에서 [File] - [New] - [Other...] 를 누른다.
3. [Spring] - [Spring Legacy Project] 를 누른다.

4. 아래와 같이 설정을 해 줍니다.
- Project name : YGTest
- Templates : Spring MVC Project

5. 아래처럼 Spring MVC Project requires a download of 16608 bytes. Proceed? 라는 다운로드 창이 나오면 Yes를 누른다.

6. 패키지 명은 아래와 같이 입력해도 무방하다. 입력 후, Finish를 누른다.
- YG.spring.test

7. 프로젝트 생성을 하면, 프로그램을 설치하고 빌드하는 등의 약 1분의 시간이 소요된다. 프로젝트가 만들어지면, 아래의 사진처럼 [프로젝트 오른쪽 클릭] - [Properties] 에서 [Java Build Path] - [Libraries] - [JRE System Library]를 클릭하고, Edit를 누른다.

8. 그 후, Environments를 누른다.

9. Execution Environments에서 JavaSE-1.8를 선택하고, Compatible JREs에 체크를 한 후에, Apply and close를 누른다.

10. 그런 다음에, 다시 Apply and Close를 누른다.

11. 근데, 위의 사진에서 JavaSE-1.8로 변경이 안된 것을 볼 수 있다. 그럴 경우에, 다시 Edit를 눌러 콤보 리스트를 열면 JavaSE-1.8 이것을 선택하면 변경이 된다.

12. 위와 같이 진행하다가 Java compiler level does not match the version of the installed Java project facet. 에러가 발생할 경우에는 아래의 링크에 들어가 해결하면 됩니다.
Java compiler level does not match the version of the installed Java project facet. 해결방법
츄르사려고 코딩하는집사입니다. Java compiler level does not match the version of the installed Java project facet. 해결방법 이 문제는 아래의 사진과 같이, 프로젝트의 Facets에 자바 버전..
yongku.tistory.com
13. pom.xml에서 java version을 1.6에서 1.8로 변경한다. 1.6에서 1.8로 변경 후에 꼭 저장을 한다. [CTRL] + S 누르자!

14. 메이븐 스프링 프레임워크(Spring FrameWork)의 버전을 맞춰 준다.
- 자신의 STS 버전을 입력하면 된다.
- 아래의 URL에 접속하면 최신 버전을 확인할 수 있다.
- https://spring.io/projects/spring-framework
- 2021년 10월 13일 기준 제가 사용하는 버전은 3.1.1 버전이다.


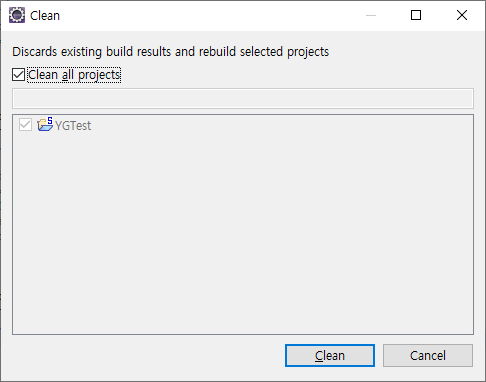
15. [Project] - [Clean]을 해준다. 아래의 화면에서 Clean을 눌러준다.
16. 그 후에, [프로젝트 오른쪽 클릭] - [Run as] - [Maven clean]을 눌러준다. 그러면 아래 콘솔창에서 Maven clean이 완료됐다고 나온다.

17. [프로젝트 오른쪽 클릭] - [Run as] - [Maven build]를 누르면 아래의 화면이 나온다.

18. 그러면, Goals에 compile을 입력하고, Run을 눌러줍니다.

19. 18번을 진행하고, 아래와 같은 문제가 발생하면 아래의 링크에서 문제를 해결할 수 있다.
Maven Build 에러 : Fatal error compiling: tools.jar not found: C:\Program Files\Java\jre1.8.0_241\..\lib\tools.jar -> [Help 1]Maven Build 에러 : Fatal error compiling: tools.jar not found: C:\Program Files\Java\jre1.8.0_241\..\lib\tools.jar -> [Help 1]
츄르사려고 코딩하는집사입니다. Maven Build 에러 : Fatal error compiling: tools.jar not found: C:\Program Files\Java\jre1.8.0_241\..\lib\tools.jar -> [Help 1] 문제 해결 방법 이클립스(Eclipse)에서 스..
yongku.tistory.com
이 다음으로, 톰캣(Tomcat) 연동하기입니다.
20. 이클립스(Eclipse) 아래 Server창에 있는 'No servers are available. Click this link to create a new server ...'를 누른다.

21. [Apache] - [Tomcat v7.0 Server]를 선택한다. 톰캣(Tomcat) 버전은 각자 알아서 하면 된다!

22. [Download and Install...] 버튼을 누른다.

23. 'I accept the terms of the license agreement'를 클릭 후, Finish를 누른다.

24. 설치된 톰캣(Tomcat) 경로를 잡아 주고 Next를 누른다.

25. [Available] 에 있는 프로젝트를 선택하고, Add를 눌러 [Configured]로 옮겨줍니다. 그리고 Finish를 누릅니다.

26. 그러면, 아래와 같이 Servers 탭에 Tomcat v7.0 Server at localhost [Stopped, Republish]가 나온다.

27. 이제 서버를 오른쪽 클릭하여 Start를 누르자.
그러면 'Tomcat v7.0 Server at localhost [Started, Synchronized]로 된다.
28. 그리고 나서, http://localhost:8080 을 접속하자.
- 서버 타임아웃 에러가 발생하면 아래의 링크에 가서 문제 해결을 하면 된다.
이클립스 서버 타임아웃(Time Out) 에러 해결 방법
츄르사려고 코딩하는집사입니다. 이클립스(Eclipse)에서 서버를 실행할 때 45초로 서버 시작 시간이 Default로 되어 있기 때문에 넘어가면 오류가 발생합니다. 이클립스(Eclipse)에서 45초라는 기준을
yongku.tistory.com
29. The origin server did not find a current representation for the target resource or is not willing to disclose that one exists. 문제가 발생하면, 아래의 링크에서 문제를 해결할 수 있다.
The origin server did not find a current representation for the target resource or is not willing to disclose that one exists.
츄르사려고 코딩하는집사입니다. The origin server did not find a current representation for the target resource or is not willing to disclose that one exists. 문제 해결 방법..
yongku.tistory.com
30. 그리고 나서, 다시 서버를 Run 시킨 후 http://localhost:8080 에 들어가면 아래와 같이 성공적으로 나온다.

여기까지가 스프링 프레임워크(Spring FrameWork)에서 프로젝트를 위한 세팅하는 방법이다. 여기까지 세팅을 하면 이제 프로젝트를 어느 정도 문제없이 시작할 수 있다.
'IT > 스프링(Spring)' 카테고리의 다른 글
| 스프링 배치(Spring Batch)와 Quartz (0) | 2022.01.20 |
|---|---|
| XML CDATA(Character Data) 사용 방법 (0) | 2021.11.17 |
| 스프링 프레임워크(Spring Framework)에서 DispatcherServlet 통해 화면이 뿌려지는 방법 (0) | 2021.10.20 |
| 스프링 프레임워크(Spring Framework)에서 DispatcherServlet이 뷰(View)를 찾는 방법 (0) | 2021.10.15 |
| 스프링(Spring) MVC패턴(Model, View, Controller) Model 2 (0) | 2021.10.09 |
| 스프링(Spring) Ibatis/Mybatis에서 ##, #{}과 $$, ${}의 차이점 (1) | 2021.09.17 |
| 스프링(Spring) MyBatis typeAliases (0) | 2021.04.29 |
| 스프링(Spring) MyBatis란? (0) | 2021.04.29 |


최근댓글