
반응형

Three.js를 사용하여 WMS 창고 시각화를 하고 있는데, 특정 rack에 저장되어 있는 bin 객체(박스 형태)를 클릭하면 해당 객체에 어떤 sku, 개수 등을 가지고 있는지 툴팁(Tooltip)을 출력되도록 구현하는 방법에 대해 기록한다.
Three.js 특정 도형 마우스 클릭 시 툴팁(Tooltip) 출력되도록 구현하기
먼저, 개발해야 하는 방향에 대해 설명을 한다.
① 해당 객체를 생성할 때 해당 객체에 데이터를 넣는다.
② Three.js 라이브러리에서 제공하는 rayCaster와 Mouse의 Vector를 정의한다.
③ rayCaster의 Mouse 위치의 Vector를 계산하여 교차하고 있는 그 위치의 도형 데이터를 가져온다.
④ 도형 데이터를 가져와서 툴팁을 생성한다.
툴팁 생성 시 위의 방향 흐름대로 개발하면 된다.
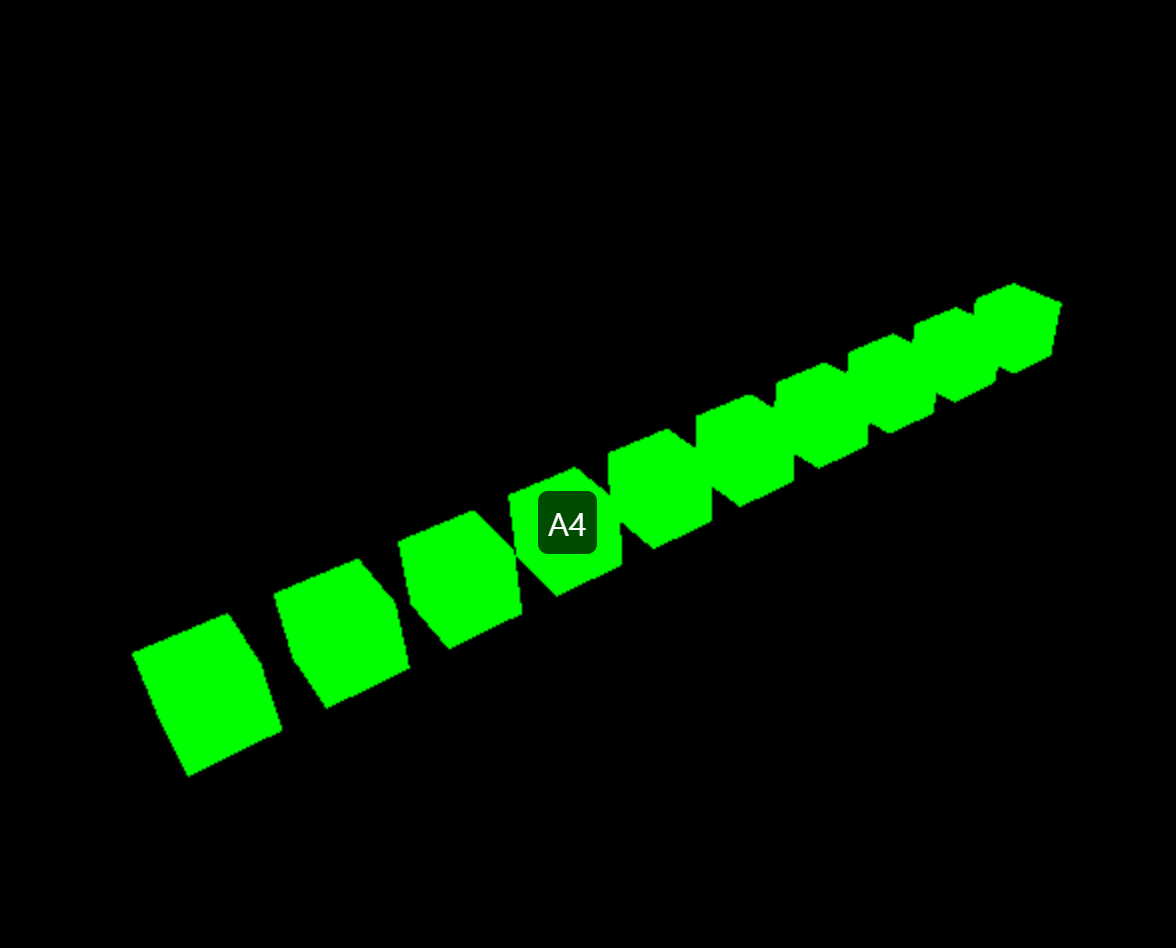
아래의 코드를 실행을 했을 때, 해당 큐브를 클릭하면 A4라는 툴팁이 생성되게 된다.
여기서 주의해야 할 점이 하나하나의 객체에 id 부여하는 것은 간단하겠지만, id가 아니라 실질적인 데이터를 넣을 경우, scene에 바로 add를 하지 말고, 따로 group을 만들어서 맨 마지막에 scene에 add를 해야 정상적으로 툴팁이 출력이 된다.
전체 예제 코드
<!DOCTYPE html>
<html lang="ko">
<head>
    <meta charset="UTF-8">
    <meta name="viewport" content="width=device-width, initial-scale=1.0">
    <style>
        body { margin: 0; }
        canvas { display: block; }
        #info {
            position: absolute;
            top: 10px;
            width: 100%;
            text-align: center;
            z-index: 100;
            display: block;
            color: white;
        }
    </style>
</head>
<body>
    <script type="importmap">
        {
            "imports": {
                "three": "https://unpkg.com/three@0.150.0/build/three.module.js",
                "three/examples/jsm/controls/OrbitControls": "https://unpkg.com/three@0.150.0/examples/jsm/controls/OrbitControls.js"
            }
        }
    </script>
    <script type="module">
        import * as THREE from 'three';
        import { OrbitControls } from 'three/examples/jsm/controls/OrbitControls';

        // 씬, 카메라, 렌더러 설정
        const scene = new THREE.Scene();
        const camera = new THREE.PerspectiveCamera(75, window.innerWidth / window.innerHeight, 0.1, 1000);
        const renderer = new THREE.WebGLRenderer();
        renderer.setSize(window.innerWidth, window.innerHeight);
        document.body.appendChild(renderer.domElement);

        // 컨트롤 추가
        const controls = new OrbitControls(camera, renderer.domElement);

        // 카메라 위치 설정
        camera.position.z = 15;

        // 큐브 10개 생성 A1 ~ A10
        const cubes = [];
        const geometry = new THREE.BoxGeometry(1, 1, 1);
        const material = new THREE.MeshBasicMaterial({ color: 0x00ff00 });

        for (let i = 0; i < 10; i++) {
            const cube = new THREE.Mesh(geometry, material);
            cube.position.x = i * 1.5 - 6.75; // 10개의 큐브를 균등하게 배치
            cube.name = `A${i + 1}`; // 큐브에 이름 지정
            scene.add(cube);
            cubes.push(cube);
        }

        // 레이캐스터 설정
        const raycaster = new THREE.Raycaster();
        const mouse = new THREE.Vector2();

        // 툴팁 요소 생성
        const tooltip = document.createElement('div');
        tooltip.style.position = 'absolute';
        tooltip.style.backgroundColor = 'rgba(0,0,0,0.7)';
        tooltip.style.color = 'white';
        tooltip.style.padding = '5px';
        tooltip.style.borderRadius = '5px';
        tooltip.style.display = 'none';
        document.body.appendChild(tooltip);

        // 마우스 클릭 이벤트 리스너
        window.addEventListener('click', onMouseClick, false);

        function onMouseClick(event) {
            // 마우스 위치 계산
            mouse.x = (event.clientX / window.innerWidth) * 2 - 1;
            mouse.y = -(event.clientY / window.innerHeight) * 2 + 1;

            // 레이캐스팅
            raycaster.setFromCamera(mouse, camera);
            const intersects = raycaster.intersectObjects(cubes);

            if (intersects.length > 0) {
                const intersectedCube = intersects[0].object;

                // 툴팁 표시
                tooltip.textContent = intersectedCube.name;
                tooltip.style.left = event.clientX + 'px';
                tooltip.style.top = event.clientY + 'px';
                tooltip.style.display = 'block';

                // 3초 후 툴팁 숨기기
                setTimeout(() => {
                    tooltip.style.display = 'none';
                }, 3000);
            }
        }

        function animate() {
            requestAnimationFrame(animate);
            controls.update();
            renderer.render(scene, camera);
        }

        animate();
    </script>
</body>
</html>
반응형


최근댓글